Drawing and Connecting Shapes
Drag from Shapes Panel
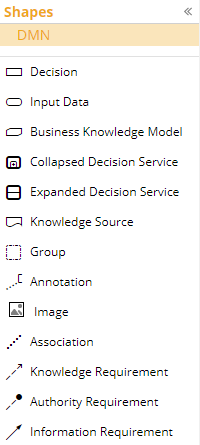
You can access the DMN shapes by clicking on the DMN shapes palette selection in the “Shapes” menu and dragging them onto the diagram.
Dropping a shape will automatically create space if there is not enough space available. Dropping a decision on an Information Requirement (highlighted) will insert the decision to the link.
Selecting Shapes
The DRD contains two types of shapes: nodes and links. Links, also called connectors, are used to connect two nodes. A link must be properly attached to a connection point at both ends to be valid. Improperly connected links are invalid and colored red in the tool. You must adjust the endpoint to properly connect the link.
Normally you use classic mouse and keyboard interactions to select and move the shapes:
-
A single click on a shape selects only this shape.
-
Clicking outside of a shape and dragging to create a selection box selects all the shapes completely inside the selection box on the mouse click release.
-
Ctrl-clicking on a shape adds it to the current selection if it was not already selected or removes it from the selection if it was already selected.
-
When a selection is active, clicking and dragging one of the selected shapes will move all of the selected shapes in that direction.
-
When a selection is active, using the keyboard arrows will move the selected shapes in that direction. Holding the ctrl key at the same time moves by one pixel. Right-clicking on a shape brings up its context menu.
Alternatively, operations on the Home ribbon can be used to select shapes:
|
Select all the shapes on the current diagram. |
|
Clears the selection. |


The Home ribbon also offers operations to manipulate selected shapes.
|
Align nodes based on a defined size to the first node in the selection. |
|
Resize all selected nodes to the size of the first node in the selection. |
|
Create a virtual group that makes selecting one node in the group select all other nodes of the group. |
|
Ungroup a previously created group. |
|
Bring your shape(s) forward if they are overlapping with other shapes or bring them completely to the front. |
|
Send your shape(s) backward if they are overlapping with other shapes or send them completely to the back. |


Labeling Shapes
Entering text on a selected node creates its label. For nodes that are DRG elements, the label is by default the name of the element and the name of the variable it represents in decision logic. This is one reason why variable names in FEEL may contain spaces and other characters disallowed in the variable names in other languages.
In DMN, links should never be labeled.
Connecting Shapes
Smart arrows
When selecting a single node, four triangle icons called smart arrows will appear, one on each side of the node. Clicking on a smart arrow will automatically create a link of the proper type to a close node on that side. For example, if the close node is a decision it will create an information requirement, but if it is a BKM it will create a knowledge requirement. If no shape is close in that direction and you hover over a smart arrow, a quick pick dialog appears showing various types of target nodes:
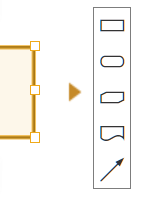
Selecting one will create a new node of that type and a link to it. If you hover too long before selecting, it will create a new decision node in that direction and a link to it.
Clicking and dragging the smart arrow lets you create a link to a node at the drop location.