Data Input Mapping
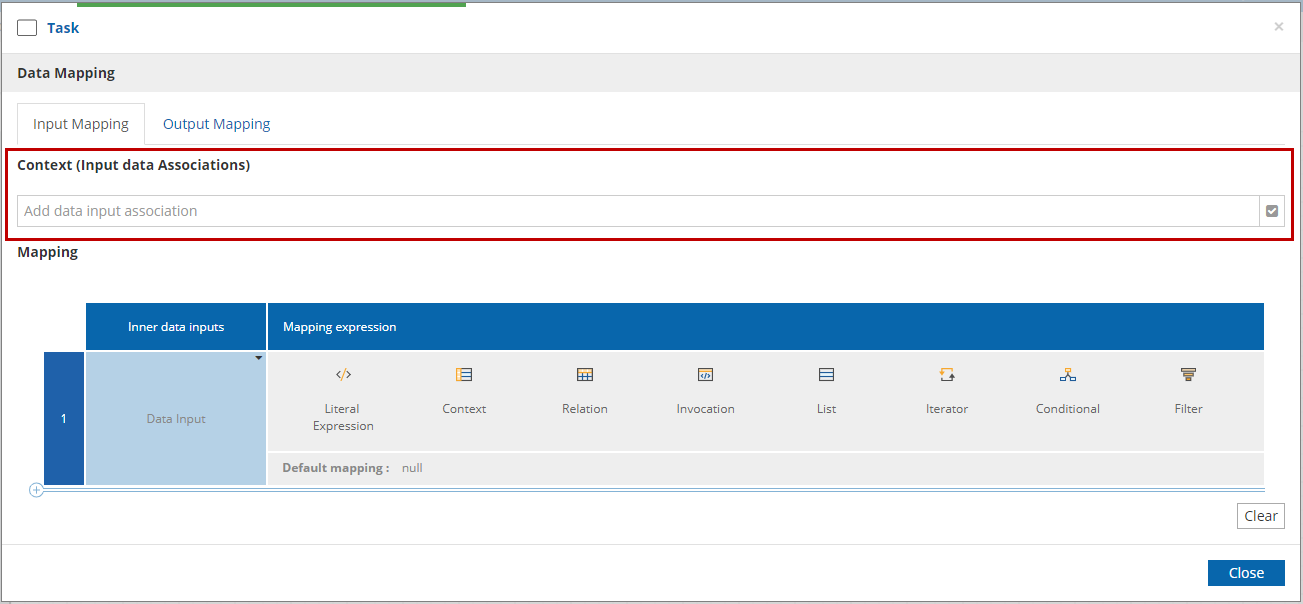
The Data Input Mapping allows you to define the data transformation for Data Input Associations connected to the selected shape, mapping process variables (data objects, data inputs, and datastores) to task inputs. The mapping has two parts: Context, naming the process variables, and Mapping, naming the task inputs and the FEEL expression computing their value.
Context
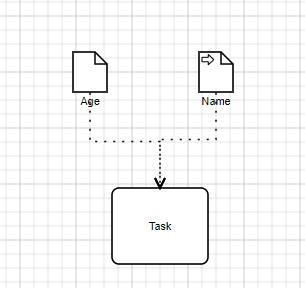
The Context list is populated with process variables drawn with input data assocations to the shape. If you add more, the process variabe and an input data association will be added to the diagram.
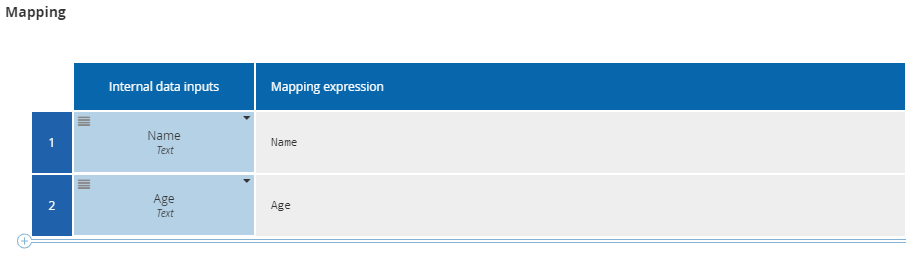
For example, a diagram like the one below will populate Name and Age in the Context list.

Each element listed in the context can be edited, deleted or you can access to their details, such as their datatype.
Mapping
The Mapping dialog is a table with two columns. It is essentially the same as an Invocation boxed expression from DMN.
The first column, labeled Inner data inputs, names the task or event inputs. For some elements, those are given and cannot be changed. For others, you can define them here.
The second column, Mapping expression, lets you enter a boxed expression mapping values of the process variables named in Context to each task/event input. This expression can be a simple FEEL literal expression or any DMN boxed expression type.
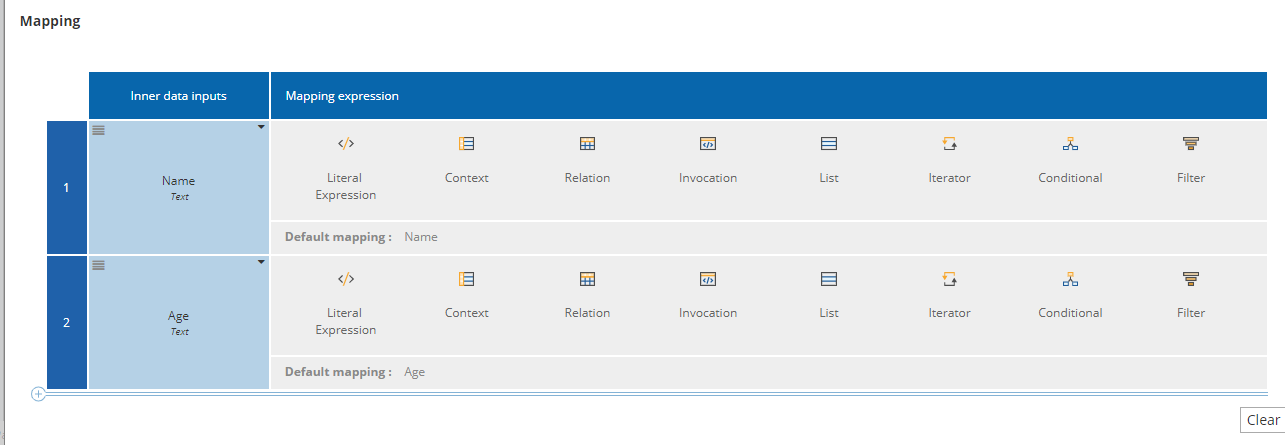
Default mapping
When you don’t specify any mappings, the tool does some default mapping depending on the type of the task, the inputs that are linked by data associations and the name of those inputs. The default mapping is equal to null when there are no matched inputs. As soon as user enter a value on one of the mapping, the default mapping on the other inputs doesn’t apply anymore, they will be equal to null by default.
The default mapping value is displayed at the bottom of the row of the value of the mapping or if a Literal Expression was selected, it will appear as placeholder on the value.
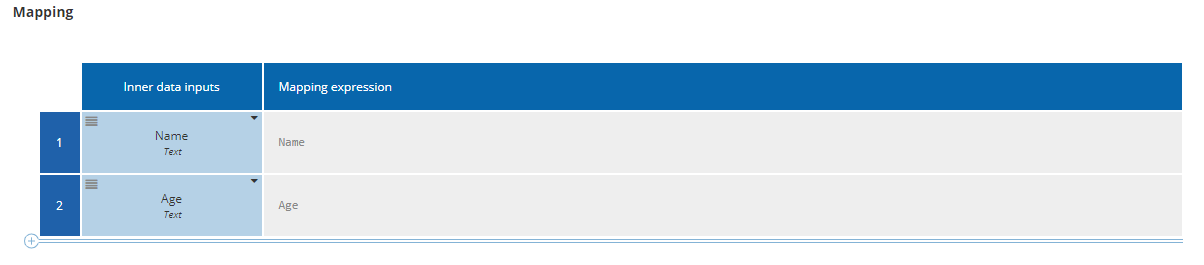
Defining a Mapping
For example, lets say that we want to do a one to one mapping.
-
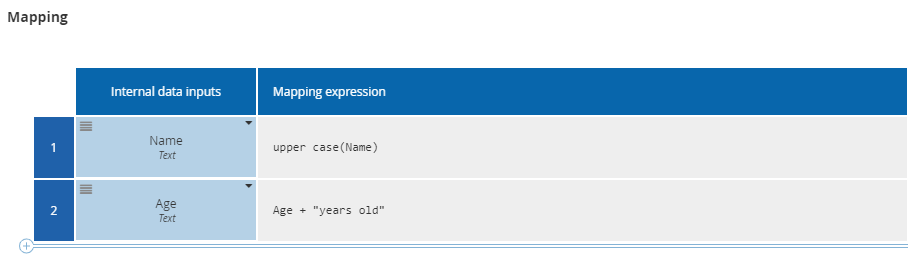
Navigate in the right column for each inner data inputs and select the "Literal Expression" logic.
-
Then in each literal expression, just write the name of the element from your current context you wanna assign to the inner data input.
-
(Optional) If you want you can use the FEEL language to add some transformation to your data.
-
Then your mapping is done, congratulations !
-
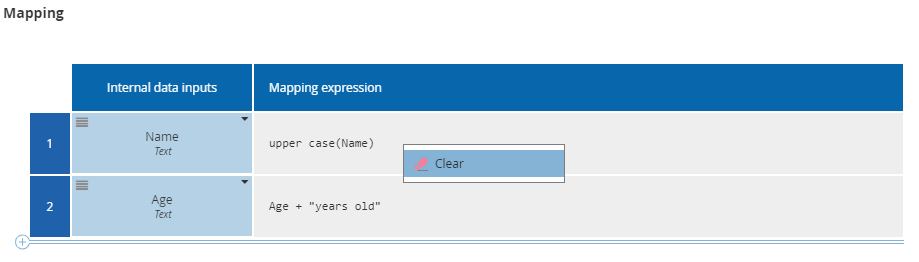
If you want to clear the mapping you can use the button "Clear" at the end. This will clear all the input mapping! If you want to just clear one of them, click on the expression and use the clear functionality of the logic.
Multi instance mapping
When your task, call activity, sub-process has the MI parallel loop or MI sequential loop (cf. Multi instance Loop Details) attribute enabled, you will have an additional section in your data input mapping dialog.

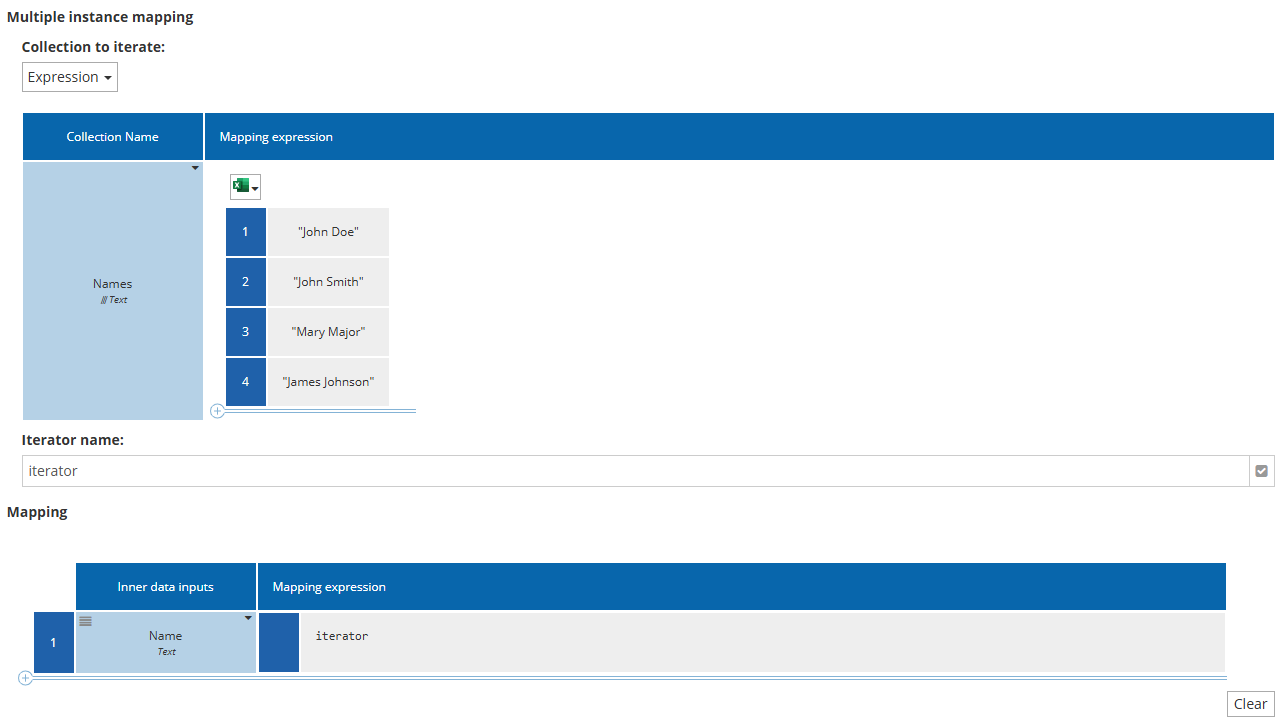
The "Collection to iterate" dropdown allows you to choose an element from your context with a data type which is a collection. The iterator name field is used to create a new variable representing one item in that collection. This variable is used in the mapping expression, defining the mapping of each item in the collection.
For example if I have in my context a data input called "Names" which is a collection of string and I create an iterator variable called "Iterator" which gonna have the string type. Then I will be able to use the iterator in my mapping expression.

We still can also use the FEEL language function with it if we want to transform the data.

Alternatively, you can select "Expression" from the "Collection to iterate" dropdown. A boxed expression editor will then appear, offering more flexibility by allowing you to create customized collections according to your needs.
User and Manual tasks
For a user or manual task, the inner data inputs are displayed to the user to help them perform their task in the different notification channels (forms, emails, …).
It is possible to hide an inner data input by clicking on and unchecking the option to Display on Form.
Business rule task
If data input mapping is missing and in bound decision or decision service, a datastore is set as an input, then datastore’s content will be used while doing the mapping. If a mapping is done at business rule task level, then mapping will prevail on datastore’s content mapping done in bound decision or decision service model.