Test
The Test action on the Execution ribbon lets you test the process in execution.
If the Test functionality is grayed out, it is most likely that your model is not executable. This can be changed by right clicking on the diagram and selecting Attributes/Executable.
Clicking Execution/Test first compiles your model into an executable form. Any errors encountered will be reported, and you must fix them before entering Test Mode.
In test mode, the model will become read-only and will display a left panel with the test controls and a test bar at the top.
Test Panel
The test panel on the left is divided into 5 tabs: Trace, In, Data, Out, and Breakpoints. Initially In is selected, where you provide the data inputs for the process.
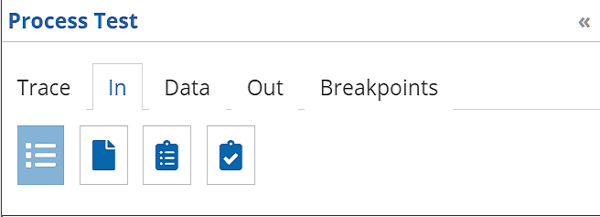
In
Data input values can be supplied in a variety of ways, selected by the icons shown in the figure above: an HTML form, a json or XML file, or a web form that persists test data for reuse across models.
| Mode | Description |
|---|---|
HTML |
A web form when you type the inputs manually. See the Form section below for more information on the different widgets that compose the form. Inputs that are data tables may be uploaded from an Excel file. |
File |
An input to select or drop a file to be used as input for the service. The service accepts JSON, XML or Excel files. A template can be downloaded to have the expected format for each type of file. Note that the Excel file support is limited to models that do not contain collections as input. |
Test case |
A selector that allows to load a previously saved test case inside the HTML mode to edit and/or submit. |
Test Data (Require Automation) |
A web form that allows to persist each inputs as test data to be reused across models. Test data is shared across all users and keyed using the data type of the input. Therefore two models using a data type tPerson can be started using the same test data. This form also allows to manage the full life cycle of test data. See the Form section below for more information on the different widgets that allows to define the test data |
Form
With HTML input, each input element has an associated widget specific to its datatype that allows you to enter the data. Note that if no data is entered in a field, the value is considered null except for Text inputs where it is considered an empty string. A null value can also be entered for a Text input by pressing the delete or backspace key.
Structures and collections will also have a caret to the left to their name to allow to expand or collapse them. They also have a null icon that will either be grayed out (the value is not null) or dark (the value is null). Clicking on the null icon nulls out the value of a structure or collection.
The collection input also offers an Excel button to import and export the data in the collection as an Microsoft Excel file. Please note that complex data structure will not all be possible to represent in an Excel file.
Trace
The Trace view, used for debugging, displays the data of executed service nodes. It is possible to click on them to obtain the detail of the inputs and outputs of each nodes. The inputs and outputs of the nodes are presented in a user readable format and also raw as the events emitted for the ServiceNodeStarted/ServiceNodeFinished events.
The Trace view presents the history of everything that already occurred in the service and when the service is stopped waiting for an external trigger (user task, message, breakpoint, …), the trace presents required data to input to continue the service.
Data
This tab presents all the service variables. It is possible to modify them and update them using the Update button when the service is still executing.
Out
When the service completes, the output results are presented. From there, you can save the results as a Test case or download the results as a JSON file.
Breakpoints
Display the configured breakpoints and allows to check an option to skip all breakpoints.
When the service progresses, the taken path is highlighted in green.
Setting Breakpoints
When hovering on the diagram, breakpoints overlay become visible when you mouse-over a supported node. Clicking on these icons will set/clear breakpoints. The following breakpoints can be set:
-
Before an activity: The service will stop after having executed the input data mapping and before invoking the activity logic. It will be possible to modify values post data mapping.
-
After an activity: The service will stop after having executed the activity but before executing the output data mapping. It will be possible to modify values returned by the activity before the mapping.
-
On a sequence flow: The service will stop when navigating the sequence flow. It is possible to change any data variable at this time.
Breakpoints can be added/removed while the test session is active.
In modeling mode, it is also possible to display the breakpoints overlays using the  right side panel.
Test Bar
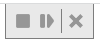
-
The square button stops the currently running service without exiting Test Mode. You can then enter new input values.
-
The play-pause button continues a process paused at a User task or breakpoint.
-
The x button closes the test mode.
Tokens
Tokens represent currently active tasks of the workflow instance. There can be one or more active token at any point in time during life time of the workflow instance.
The test interface allows to manage tokens within the workflow instance. The main use case is to allow to jump back and forth without the need to go through each activity on the way.
While workflow instance is running, users can:
-
Move token from one node to another by simply dragging and dropping selected token
-
Create new tokens on nodes by right clicking on node where the token should be created and select
Create Tokenfrom the menu -
Delete existing tokens from nodes by right clicking on the token and select
Delete Tokenfrom the menu
| Tokens can be created on any type of node, including activities, gateways, events. |
Token moves are reflected in the trace view that can become useful set of information when token is moved multiple times to the same node.
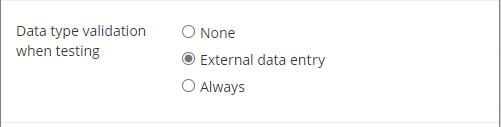
Data type validation
By default, test is done using the "None" Data type validation. You may change that by going to the Preferences panel.
When testing more complex models using a lot of business logic or included models, the deployment and/or execution times could be longer.
The Preferences dialog in the File menu offers advanced configurations for the testing of models.
Synchronize all dependent models when deploying and testing
This option is turned on by default. Before testing or deploying a model, model dependencies are loaded and synchronized with changes coming from the Digital Enterprise Graph. This process could require a significant amount of network processing and if the number of dependencies grows, it could slow down testing and deployment.
Disabling this option will cause the automation suite to use the already saved version of the dependencies also enabling the automation to cache the compiled version of those models to further speed up model compilation time on subsequent operations.
| Do not disable this option when deploying models with dependencies using operations which requires identities. |