Change Request
Change request allows users to promote models from one place to another (e.g., from development to test) with traceability, collaboration, and a defined approval workflow.
A change request is created by selecting the models to be promoted, entering a description of the changes and assigning reviewers (user or group).
The reviewers can then visualize the models that changed and their modification. They can then approve or reject the proposed changes.
Change requests are kept for auditing purposes.
Creating a Change Request for a place
-
From the Places panel:
-
Go to the Places list.
-
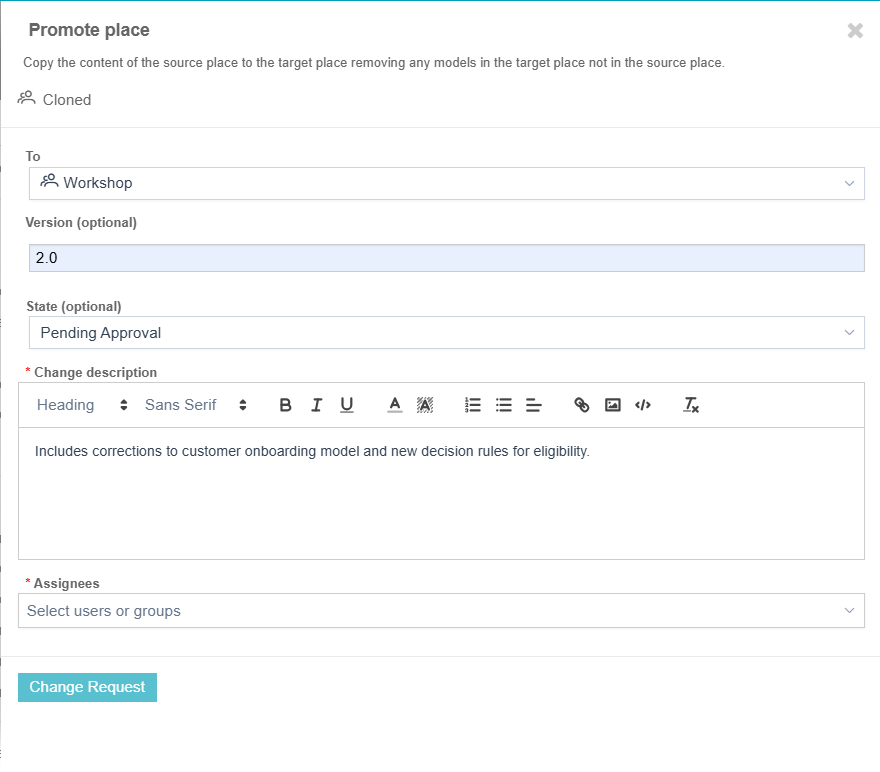
Select a place, then click Promote Place.
-
Choose the Target Place, set the Version, and (optionally) select a State:
-
No State
-
Draft
-
Pending Approval
-
Published
-
-
To convert this into a Change Request:
-
Check the Create Change Request option.
-
Provide a Change Description.
-
Select one or more Assignees (users or groups).
-
-
Click the Create Change Request button.
-
Creating a Change Request for a model and its dependencies
-
From the Models list:
-
Navigate to the Models section.
-
Select one or more models (e.g., workflow, decision, case, etc.).
-
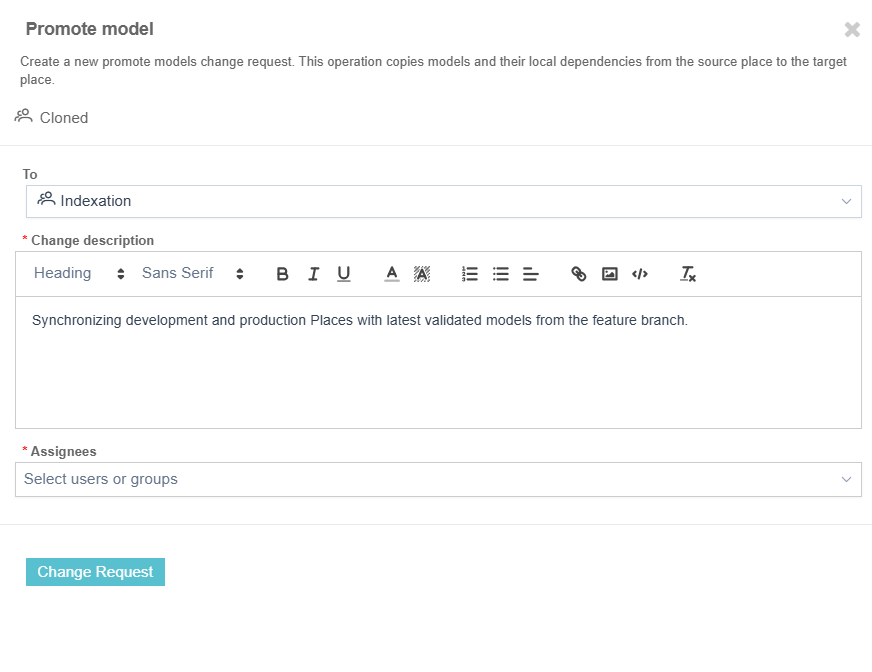
Right-click and choose Promote Model.
-
In the promotion panel:
-
Choose the Target Place.
-
Enter a Change Description.
-
Select Assignees.
-
-
Click Create Change Request.
-
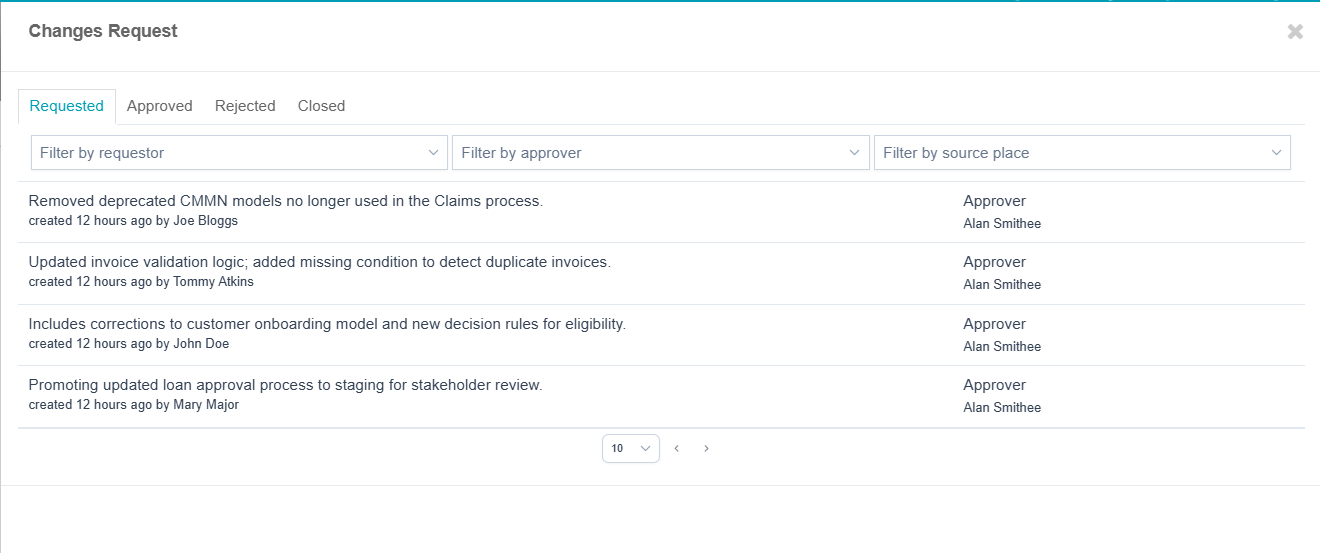
Listing Change Requests
To view existing Change Requests:
-
Go to the relevant Place.
-
Open the Change Requests tab to see all requests targeting this place.
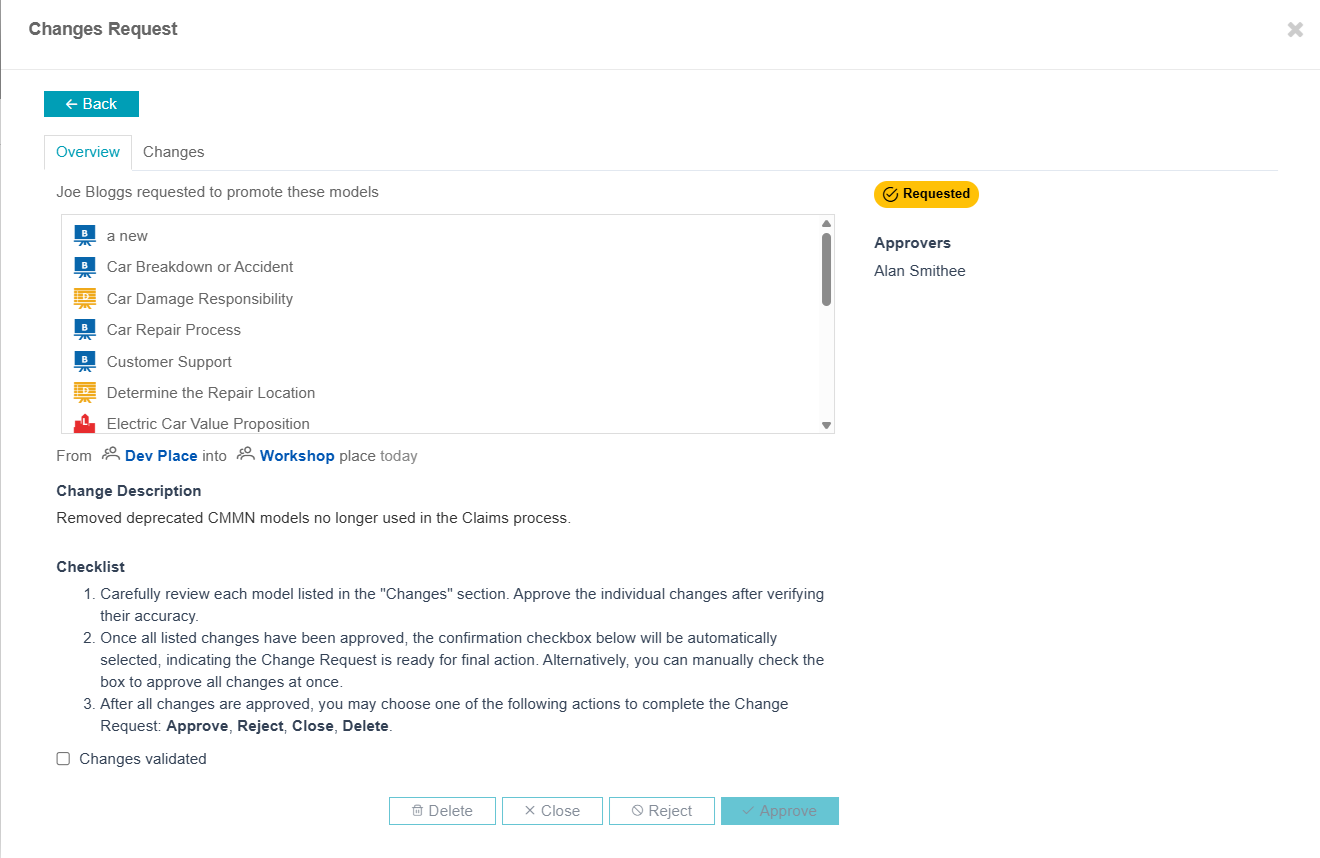
Reviewing a Change Request
Approvers can review and take action on submitted Change Requests.
How to Review
-
Open a Change Request from the list.
-
The Overview tab displays:
-
Creator
-
Source and Target Places
-
Date Created
-
Change Description
-
Status
-
Assignees and Approvers
-
Included Models
-
For approved or rejected requests:
-
Performer (who approved/rejected)
-
Approval Description
-
Date Closed
-
-
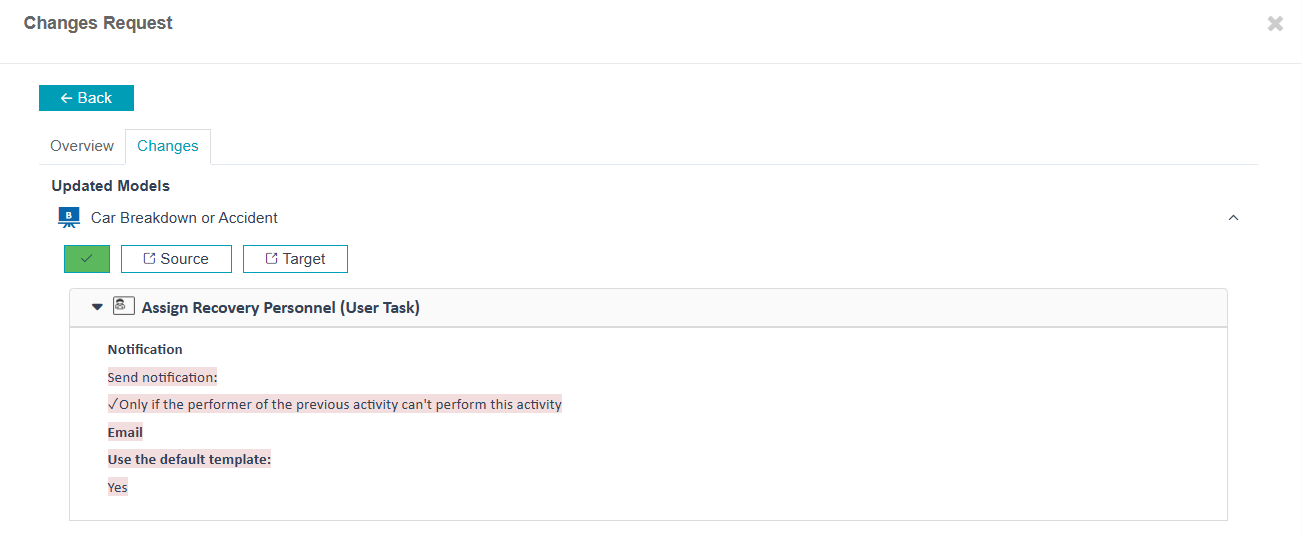
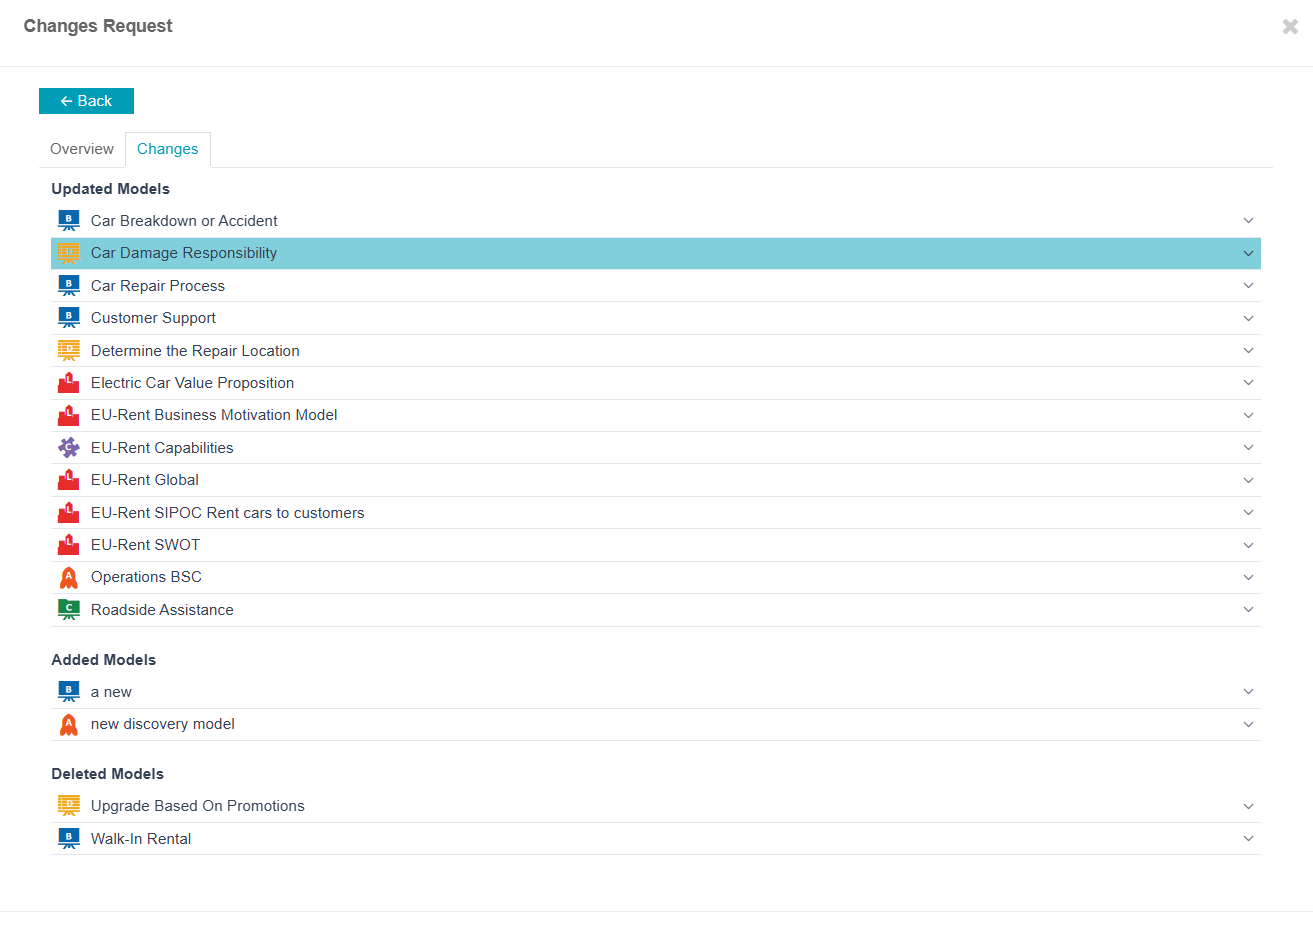
Changes Tab Details
The Changes tab lists:
-
Updated Models
-
Added Models
-
Deleted Models
Reviewing Models
-
For Updated Models:
-
Click a model to open its review panel.
-
Click Approve to validate the change.
-
Use the Open Source Model and Open Target Model buttons to view each version in a new window.
-
A side-by-side diff view highlights changes.
-
-
For Added and Deleted Models:
-
Click Approve to validate.
-
Use the Open Model button to inspect the model in a new window.
-